These instructions do not apply to a Nextcloud installation that you created via the wizard – the wizard creates the corresponding file automatically.
If you want to execute the command ‘php occ …’ as a “limited” shell user (chrooted shell = jailkit), you have to make two changes to the Nextcloud configuration. We use our own configuration for this, which is not overwritten during an update and automatically detects whether a request is made via the shell or the website.
On our managed servers, you can view the custom.config.php directly in ISPConfig for the specific website and upload it directly to the config folder via FTP.
This guide only says shell, but that all applies to cron jobs running ‘chrooted’ as well.
To find the mode in which a cron job is executed, open the corresponding cron job in ISPConfig:

In the following example, our website is installed with Nextcloud in the directory /var/www/clients/client3/web1602/web. You can find the directory in ISPConfig for a website in the first part of “Different Document Root” when you open the “Advanced” section.

Adjust values in the Nextcloud configuration
- datadirectory
A chrooted shell user cannot access the complete path of the web page /var/www/clients/client3/web1602/web. Therefore the datadirectory must be “rewritten” if you want to execute “php occ” via the shell. We simply use a custom.config.php for this.
dbhost - You can not use localhost as the dbhost. PHP uses a connection via the socket file with localhost, because such a connection is the fastest. But in a chrooted shell the socket file is not available and you get the error “Doctrine\DBAL\Exception: Failed to connect to the database”. Either you change the ‘dbhost’ in config.php from ‘localhost’ to ‘127.0.0.1’ (then the connection is always over TCP/IP is slower) or you simply use our custom.config.php.
Create custom.config.php
In the config directory of the Nextcloud installation, create the file custom.config.php or create it on your PC and then upload the created file via FTP into the config directory.
You only need to adjust two values in the custom.config.php for your Nextcloud installation:
$basedir – here you enter the path to your website as it is displayed in ISPConfig and only leave out ‘/web’ at the end.
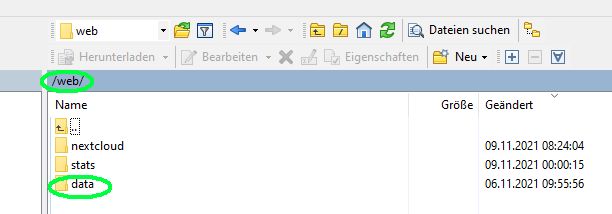
$dir – this sets the data directory of Nextcloud. In most installations the data directory is located in the document root of the website. If you log in via FTP, you can easily find the directory:
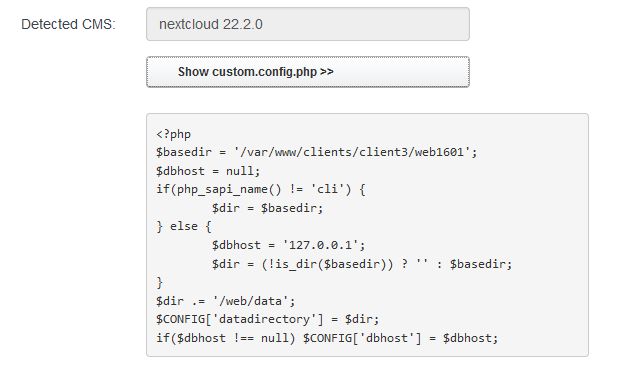
The custom.config.php looks like this in our example:
<?php

$basedir = '/var/www/clients/client3/web1601';

if(php_sapi_name() != 'cli') {
  $dir = $basedir;
} else {
  $dbhost = '127.0.0.1';
  $dir = (!is_dir($basedir)) ? '' : $basedir;
}
$dir .= '/web/data';
$CONFIG['datadirectory'] = $dir;
if($dbhost !== null) $CONFIG['dbhost'] = $dbhost;