In the following text we will show you how to speed up an already existing Joomla installation with a Redis cache.
If you install a new Joomla with our web wizard, you can also install and activate the Redis cache automatically.
Create a Redis Instance
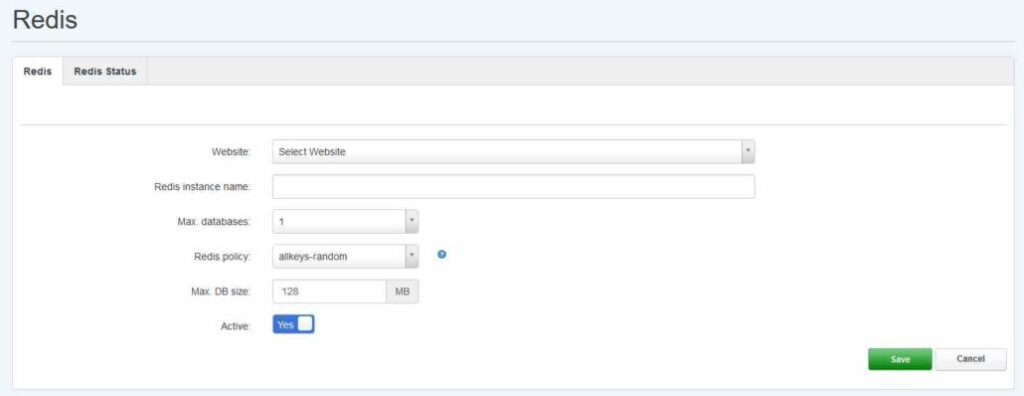
Log in to ISPConfig on your managed server. In the Sites section you will find the item Redis Databases under Databases on the left. Select this item and create a new Redis-Instance.

You just need to select the appropriate website and assign a suitable name for the Redis instance. You can leave the policy unchanged.
The max. database size also depends on the number of visitors. You can start with the default 128 MB and adjust this value later.
After you have created the new instance, open it in ISPConfig and write down the Redis Port and the Redis Password.
Configure Joomla
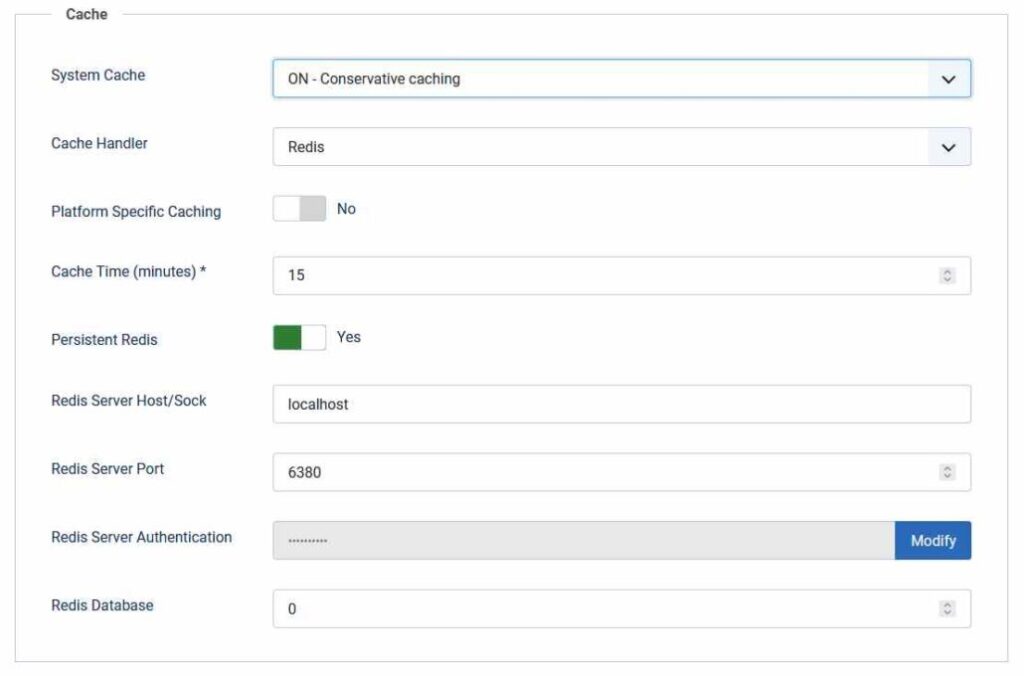
Once you have logged into Joomla, open the Global Configuration section, select the System section and enable the cache.
You can use Redis as cache for the site and / or for the sessions.
The settings are identical in both cases.

You have to set the value of Redis Server Port and Redis Server Authentication according to the created Redis instance.
The values for the Redis cache can also be displayed on the website in ISPConfig by clicking on “Show Redis-Config”.
